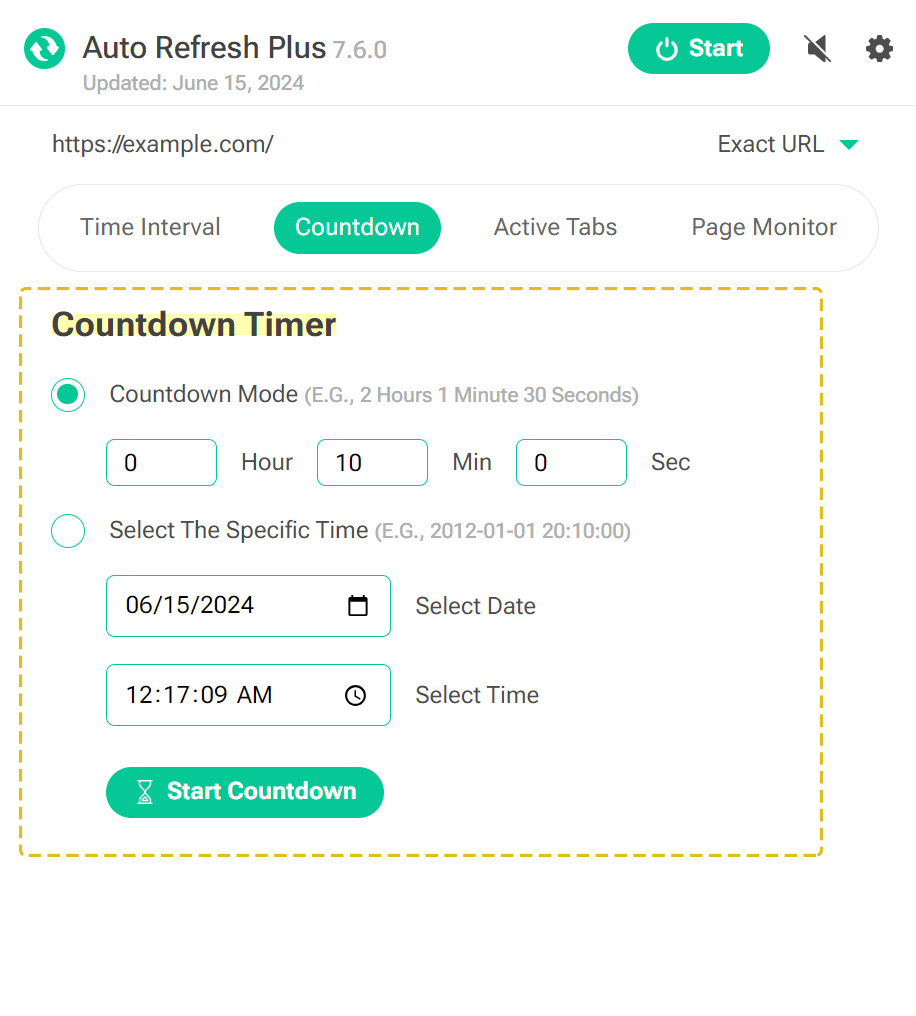
If the countdown timer in Auto Refresh Plus (ARP) doesn't work when you click "Start," it might be due to using the wrong button. Here’s a detailed explanation to help you understand and resolve this issue:
Ensuring Proper Use of Countdown Mode
In ARP, the Countdown mode starts a timer that counts down before refreshing the page. This is useful for scheduling refreshes at specific intervals. A common mistake users make is clicking the regular "Start" button instead of the "Start Countdown" button after setting the countdown time. This can prevent the countdown timer from working as intended.
Steps to Correctly Use Countdown Mode
Set the Countdown Time
First, configure the amount of time you want the countdown to run before the page refreshes. Open the Auto Refresh Plus extension and navigate to the Countdown mode settings. Enter the desired countdown time (e.g., 10 minutes).
Click the 'Start Countdown' Button
Ensure you click the "Start Countdown" button to initiate the countdown timer, not the regular "Start" button. After setting the countdown time, locate the "Start Countdown" button within the extension popup. Click "Start Countdown" to begin the countdown timer. This action ensures that the countdown is initiated correctly, and the page will refresh once the timer reaches zero.
Verify the Countdown Timer
After starting the countdown, verify that the timer is running and counting down as expected. Check the extension popup to see the countdown timer in action. Ensure that the timer is decreasing and will trigger the page refresh at the specified time.
By following these steps, you can ensure that the Countdown mode in Auto Refresh Plus works correctly, allowing you to manage your automatic refresh cycles effectively.
